

Voltage drops can cause serious electrical problems, leading to weak power output, dim lights, or even system failures. If you’ve noticed inconsistent electrical performance in your vehicle or home circuits, excessive voltage drop might be the culprit.
Checking voltage drops helps diagnose issues with wiring, connections, and electrical components. This guide will explain what voltage drop is, why it matters, and how to test it properly. By the end, you’ll have the skills to troubleshoot electrical problems and ensure efficient power flow.
Understanding Voltage Drop and Its Effects
Voltage drop occurs when electrical current travels through a circuit and loses energy due to resistance. A small amount of voltage drop is normal, but excessive drops indicate wiring issues, corroded connections, or failing components.
- What Causes Voltage Drop?
Several factors contribute to voltage drop in a circuit. The most common causes include:
- Corroded or Loose Connections: Poor electrical connections increase resistance, leading to a significant voltage drop.
- Undersized Wires: Thin wires cannot handle high current loads efficiently, causing power loss along the circuit.
- Long Wire Lengths: The longer the wire, the more resistance it creates, resulting in voltage loss before reaching the intended component.
- Excessive Electrical Load: If too many devices or components draw power from the same circuit, voltage drop increases.
- Worn or Damaged Components: A failing alternator, weak battery, or degraded wiring can lead to voltage inconsistencies.
- Why Is Voltage Drop Important?
A high voltage drop reduces efficiency and can cause performance issues. In vehicles, excessive voltage drop may result in dim headlights, slow power windows, or weak ignition signals. In home electrical systems, it can lead to appliances malfunctioning or failing to operate at full power.
Checking voltage drops helps ensure proper electrical function, prevents damage to sensitive components, and maintains system reliability.
How to Check Voltage Drops Step by Step
Testing voltage drop is essential for identifying electrical issues. A digital multimeter (DMM) is the primary tool used for this test. Follow these steps to measure voltage drop accurately.
Step 1: Prepare for Testing
Before starting, gather the necessary tools:
- A digital multimeter (DMM)
- Safety gloves and protective eyewear
- Access to the circuit or component you are testing
Ensure the system is powered on and under load. Voltage drop testing requires electrical current to be flowing, so turn on lights, motors, or other connected devices before testing.
Step 2: Set Up the Multimeter
Turn the multimeter to the DC voltage setting for automotive circuits or AC voltage for home electrical circuits. Select a voltage range higher than the expected reading to ensure accurate measurements.
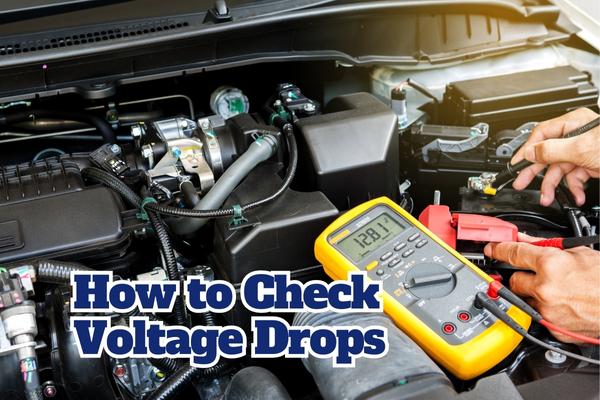
Step 3: Measure Voltage Drop Across a Connection
To check voltage drop across a wire, component, or connection:
- Place the multimeter’s positive (red) lead on the power source side of the wire or connection.
- Place the negative (black) lead on the load side of the wire or component.
- Read the voltage on the multimeter display.
Step 4: Interpret the Results
- A healthy circuit should show a voltage drop of less than 0.2 volts across connections or wiring.
- A voltage drop between 0.2V and 0.5V suggests minor resistance but is usually acceptable in longer circuits.
- A reading above 0.5V indicates excessive resistance, meaning a poor connection, corroded terminal, or faulty wire.
Step 5: Compare Voltage at Different Points
To isolate the issue, test multiple points along the circuit:
- Battery to alternator: A drop over 0.5V indicates a weak connection or failing alternator.
- Battery to starter motor: A drop over 0.2V may cause hard starting issues.
- Ground connections: Measure voltage drop between the battery’s negative terminal and the chassis; any reading over 0.2V suggests a bad ground connection.
Step 6: Fix the Voltage Drop Issue
If excessive voltage drop is found, take these steps to resolve it:
- Tighten or clean connections to remove corrosion and improve conductivity.
- Replace damaged or thin wires with a thicker gauge to handle current more efficiently.
- Reduce electrical load by redistributing power usage or upgrading components like the alternator.
By addressing the issue, you ensure proper voltage flow, preventing electrical failures and improving system efficiency.
Case Study: Diagnosing Voltage Drop in a Car Battery Circuit
John’s car had trouble starting, and the headlights were dim. Using a multimeter, he tested the voltage drop between the battery and starter. The reading showed 0.7V, indicating excessive resistance. Upon inspection, he found a corroded battery terminal. After cleaning and tightening the connection, the voltage drop reduced to 0.1V, and the car started normally again. By checking voltage drop, John quickly identified and fixed the issue without expensive repairs.
Conclusion
Checking voltage drops is a simple yet powerful way to diagnose electrical issues in vehicles and home circuits. By measuring voltage across different points, you can identify poor connections, failing components, or undersized wiring.
Regular voltage drop testing helps prevent electrical failures, ensures optimal performance, and saves you from costly repairs. If you suspect voltage drop issues, follow the steps outlined in this guide to pinpoint and fix the problem effectively.
Looking for more electrical troubleshooting tips? 🔋⚙️ Explore our other guides to keep your systems running smoothly!
FAQs About Checking Voltage Drops
1. What is an acceptable voltage drop in a circuit?
For most circuits, a voltage drop under 0.2V is ideal. Anything over 0.5V suggests resistance problems that need attention.
2. Can voltage drop cause electrical failure?
Yes, excessive voltage drop can lead to weak power delivery, dim lights, slow motors, and complete system failure if not addressed.
3. What size wire should I use to prevent voltage drop?
Use a wire gauge appropriate for the current load. Longer circuits or high-power applications require thicker wires to reduce resistance and prevent voltage drop.
4. How do I test voltage drop in a ground circuit?
Place the multimeter’s positive lead on the battery negative terminal and the negative lead on the chassis or engine block. A reading above 0.2V indicates a bad ground connection.
5. Can a bad alternator cause voltage drop?
Yes, a failing alternator may not provide enough voltage, leading to power loss in various components. Testing the alternator’s voltage output can confirm the issue.