

Changing your engine oil is one of the most essential maintenance tasks for keeping your car in peak condition. Many drivers in Billings, MT, wonder, “Can I change my engine oil myself?” The answer is yes! While it may seem intimidating at first, replacing your oil is a straightforward process that helps improve engine performance, fuel efficiency, and longevity. This guide provides clear, detailed instructions on how to change engine oil, ensuring your vehicle runs smoothly and stays protected from wear and tear.
Why Changing Your Engine Oil Matters
Engine oil lubricates vital components, reducing friction and preventing excessive heat buildup. Over time, oil breaks down and accumulates dirt and contaminants, making it less effective. Neglecting oil changes can lead to:
- Increased engine wear and overheating
- Reduced fuel efficiency
- Buildup of sludge and harmful deposits
- Costly engine repairs due to poor lubrication
Most modern cars require an oil change every 5,000 to 10,000 miles, depending on the type of oil used and driving conditions. Checking your owner’s manual ensures you follow the correct maintenance schedule.
Step-by-Step Guide: How to Change Engine Oil
Changing your engine oil involves draining old oil, replacing the oil filter, and adding fresh oil. Follow these steps carefully to ensure a successful oil change.
Step 1: Gather the Necessary Tools and Materials
Before you begin, make sure you have everything needed for the job:
- New engine oil (Check the owner’s manual for the recommended type and viscosity)
- New oil filter
- Oil filter wrench
- Socket wrench and correct-size socket
- Drain pan (to catch old oil)
- Funnel (for adding new oil)
- Gloves and safety glasses (to protect your hands and eyes)
- Shop towels or rags
- Car jack and jack stands (if needed to access the oil drain plug)
Step 2: Prepare Your Vehicle
Ensure your car is on level ground and has been turned off for at least 15-30 minutes to allow the engine to cool down. If necessary, lift the front end of your car using a jack and secure it with jack stands.
Step 3: Drain the Old Oil
- Locate the oil drain plug under the engine. It’s typically a large bolt on the oil pan.
- Position the drain pan beneath the plug.
- Using a socket wrench, carefully loosen and remove the drain plug. Be prepared for the oil to start flowing immediately.
- Allow all the old oil to drain completely, which may take 5-10 minutes.
- Once drained, wipe the drain plug clean and securely reinstall it, ensuring it’s tightened to the correct torque specification.
Step 4: Replace the Oil Filter
- Locate the oil filter, which is usually on the side of the engine.
- Use an oil filter wrench to unscrew and remove the old filter. A small amount of oil may spill, so keep the drain pan underneath.
- Before attaching the new filter, lightly coat the rubber gasket with fresh oil. This creates a secure seal and prevents leaks once the engine is running.
- Secure the new oil filter by hand, ensuring a firm fit. Tighten it just enough to create a proper seal, but be careful not to overtighten, as this could compromise the gasket.
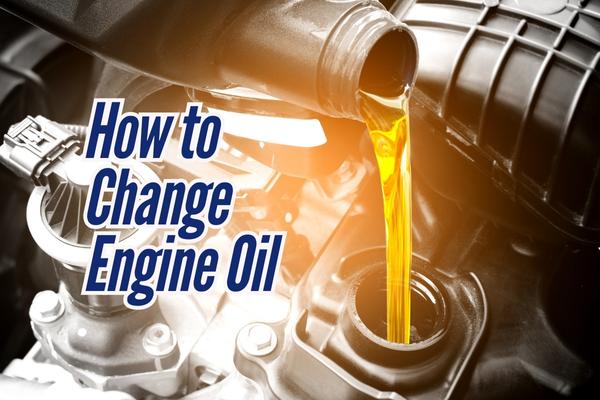
Step 5: Add Fresh Engine Oil
- Remove the oil filler cap on top of the engine.
- Place a funnel into the oil filler opening and carefully add the specified amount of fresh oil, following your owner’s manual for guidance.
- After filling, firmly secure the oil cap to prevent leaks and ensure proper sealing.
Step 6: Check Oil Levels and Inspect for Leaks
- Turn on the engine and let it run for 30-60 seconds to circulate the oil.
- Shut off the engine and allow a few minutes for the oil to fully settle before checking the level.
- Remove the dipstick, wipe off any oil, and fully reinsert it. Pull it out once more and examine the oil level—it should fall within the specified range.
- Inspect the area beneath your car for any signs of leakage around the drain plug and oil filter. If everything remains dry and secure, you’ve successfully completed your oil change!
Step 7: Dispose of Used Oil Properly
Never pour old oil down drains or on the ground. Instead, take it to a local recycling center or an auto parts store that accepts used oil.
Case Study: Avoiding Costly Repairs with Regular Oil Changes
Jason, a car owner who frequently drives long distances, skipped his oil change for over 15,000 miles. One day, his engine started making loud knocking noises and eventually stalled. After towing his car to a repair shop, the mechanic discovered severe sludge buildup, leading to worn-out bearings and internal damage. The repair bill? Over $3,500 for a full engine rebuild.
This situation could have been avoided with regular oil changes every 7,500 miles, costing less than $100 per service. Jason now follows his maintenance schedule and has noticed smoother engine performance and improved fuel efficiency.
Conclusion
Changing your engine oil is one of the most cost-effective ways to maintain your car’s performance and longevity. By following the correct steps—draining old oil, replacing the filter, adding fresh oil, and checking for leaks—you ensure smooth engine operation and prevent costly repairs.
If you’re confident in handling routine car maintenance, performing your own oil change can save time and money. However, if you’re unsure or prefer expert service, consider visiting a certified mechanic for a professional oil change.
🔧 For more expert car care tips, check out our latest guides on vehicle maintenance, troubleshooting, and DIY repairs!
Frequently Asked Questions (FAQs)
1. How often should I change my car’s engine oil?
Most vehicles require an oil change every 5,000 to 10,000 miles, depending on driving conditions and oil type. Always check your owner’s manual for specific recommendations.
2. Can I switch from conventional oil to synthetic oil?
Yes, most modern engines can use synthetic oil, which offers better protection, efficiency, and longevity. However, always verify compatibility with your vehicle manufacturer.
3. What happens if I overfill my engine with oil?
Overfilling can cause excess pressure, leading to oil leaks, foam formation, and potential engine damage. If overfilled, drain the excess oil to the recommended level.
4. Can I reuse my old oil filter when changing oil?
No, it’s highly recommended to replace the oil filter during every oil change. A clogged filter can reduce oil flow and lead to premature engine wear.
5. What should I do if I see an oil leak after changing the oil?
Check that the drain plug and oil filter are properly tightened. If the leak persists, inspect the gasket and seals. If unsure, seek professional assistance.