

Checking your car’s oil level is one of the simplest and yet most important maintenance tasks. Engine oil lubricates moving parts, reduces friction, and prevents overheating. However, many drivers overlook routine oil checks, leading to low oil levels, poor engine performance, and potential breakdowns. By learning how to check your oil level correctly, you can prevent costly repairs and ensure your engine runs smoothly. This guide explains when and how to check your oil level, helping you maintain your car’s performance and longevity.
When and Why You Should Check Your Oil Level
1. The Importance of Maintaining Proper Oil Levels
Engine oil serves multiple functions, including:
- Lubricating engine components to reduce wear.
- Regulating engine temperature by dissipating heat.
- Preventing sludge and debris buildup that can damage internal parts.
Low oil levels can lead to increased friction, overheating, and even engine failure. By checking your oil regularly, you can identify leaks, detect oil consumption issues, and avoid expensive engine repairs.
2. How Often Should You Check Your Oil?
It’s recommended to check your oil at least once a month and before long road trips. However, some factors may require more frequent checks:
- Older vehicles tend to burn or leak oil more quickly.
- Driving in extreme temperatures (hot summers or freezing winters) can affect oil viscosity.
- Frequent stop-and-go driving or towing increases engine stress and oil consumption.
By making oil checks a habit, you can catch potential issues early and ensure your engine stays protected.
Step-by-Step Guide to Checking Your Oil Level
Step 1: Park on Level Ground and Let the Engine Cool
For an accurate reading, park your car on a flat surface and turn off the engine. Wait at least 5 to 10 minutes to allow the oil to settle in the oil pan. Checking oil too soon after driving may give a false reading, as oil is still circulating.
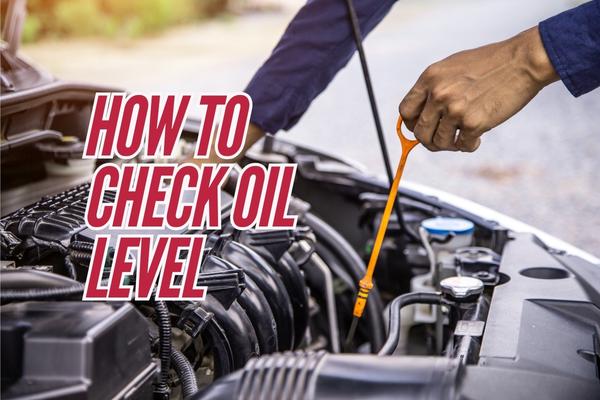
Step 2: Locate and Prepare the Dipstick
- Open the hood of your car and locate the oil dipstick— often marked with a yellow or orange handle.
- Draw the dipstick out completely.
- Wipe the dipstick clean with a lint-free cloth or paper towel to remove old oil residue.
Step 3: Insert and Remove the Dipstick for an Accurate Reading
- Reinsert the dipstick fully into its tube, ensuring it reaches the bottom.
- Pull it out again and inspect the oil level.
Most dipsticks have two marks or a crosshatched area, indicating the minimum and maximum oil levels.
- If the oil is between the marks, your oil level is correct.
- If it’s below the minimum mark, your engine may be low on oil and needs a top-up.
- If the oil exceeds the maximum mark, excess oil should be drained to prevent engine damage.
Step 4: Check the Oil Condition
While inspecting the dipstick, check the color and texture of the oil:
- Clean oil is typically amber or light brown.
- Dark or gritty oil may indicate contamination and the need for an oil change.
- Milky or foamy oil could be a sign of coolant mixing with oil, requiring immediate inspection.
Step 5: Add Oil if Necessary
If the oil level is low, follow these steps to top it off:
- Locate the oil filler cap (usually labeled “Engine Oil”).
- Use a funnel to add the recommended oil type, checking your owner’s manual for specifications.
- Add oil in small amounts, rechecking the dipstick until the level reaches the proper range.
- Replace the oil cap securely and ensure there are no leaks.
Keeping oil at the correct level prevents unnecessary engine stress and improves overall performance.
Case Study: How Regular Oil Checks Saved an Engine
Lisa, a daily commuter, rarely checked her oil level, assuming her car was in good condition. One day, her oil warning light came on, and she noticed a burning smell from the engine. After pulling over, she checked the dipstick and found almost no oil left.
She immediately added oil and took her car to a mechanic, who found a small but persistent oil leak. Because she caught the issue early, Lisa avoided a complete engine failure and an expensive repair bill.
This case highlights why routine oil checks are essential—they help identify problems before they turn into costly breakdowns.
Conclusion
Checking your oil level in Billings, MT, is a quick and simple task that can prevent serious engine damage and costly repairs. By following this guide, you can ensure proper lubrication, detect potential issues, and keep your car running smoothly.
Make it a habit to check your oil monthly, especially before long trips, and always follow your manufacturer’s recommendations for oil type and maintenance. Taking just a few minutes to check your oil can save you thousands in engine repairs.
🔧 For more expert car maintenance tips, check out our latest guides on oil changes, engine performance, and DIY auto care!
Frequently Asked Questions (FAQs)
1. Can I check my oil level when the engine is hot?
No, it’s best to check oil when the engine is cool or has been off for at least 5-10 minutes. This allows oil to settle for an accurate reading.
2. What happens if my oil level is too low?
Low oil levels cause increased friction, overheating, and potential engine failure. If your oil is low, add oil immediately and check for possible leaks.
3. How can I tell if my oil needs changing?
Check for dark, dirty, or gritty oil on the dipstick. If the oil appears thick or sludgy, it’s time for an oil change.
4. Can I overfill my engine with oil?
Yes, too much oil can cause excess pressure, oil foaming, and reduced engine efficiency. Always add oil gradually and stay within the recommended level.
5. Why does my oil level drop between oil changes?
Oil consumption can increase due to engine wear, leaks, or burning oil. If oil levels drop frequently, have your car inspected for potential issues.
Explore More Auto Care Tips
🚗 Signs You Need an Oil Change
🔧 Best Oil for Your Vehicle
🛢️ Understanding Oil Viscosity Grades
📢 Keep your car running at peak performance—explore our expert auto care resources today!