

A non-working taillight can put you at risk on the road and even result in a traffic ticket. Since taillights play a crucial role in visibility during nighttime driving and adverse weather conditions, fixing them promptly is essential. Many drivers assume taillight issues require a trip to the mechanic, but in most cases, the problem can be easily diagnosed and repaired at home.
This guide will walk you through identifying the cause of a faulty taillight and provide practical solutions to restore it. Whether it’s a burnt-out bulb, a blown fuse, or a wiring issue, you’ll have the knowledge to fix the problem safely and effectively.
Diagnosing Non-Working Taillights
Before attempting any repairs, it’s important to determine why the taillights aren’t working. Several factors can cause the issue, and each requires a different approach.
- Common Causes of Taillight Failure
- Burnt-Out Bulb: This is one of the most frequent reasons for a non-working taillight. Over time, the filament inside can wear out, preventing the light from illuminating and requiring a replacement.
- Blown Fuse: If both taillights stop working simultaneously, a blown fuse is a likely culprit. Fuses protect electrical circuits from surges, and when they blow, the circuit breaks, cutting power to the taillights.
- Faulty Wiring or Loose Connections: Damaged, corroded, or disconnected wiring can disrupt electricity from reaching the taillights. Wiring problems may also cause flickering or dim lights, requiring inspection and repair to restore full functionality.
- Bad Taillight Switch: The taillight switch on your dashboard controls the lights. If this switch fails due to wear or electrical issues, the taillights won’t turn on, requiring troubleshooting or replacement. Testing the switch with a multimeter can confirm if it’s defective.
- Grounding Issues: A poor ground connection can prevent the taillights from working properly. If the ground wire is damaged, loose, or corroded, the electrical circuit won’t complete, leading to failure or dim lighting.
- Brake Light and Taillight Interference: Some vehicles share circuits for brake lights and taillights. A malfunction in the brake light system, such as a faulty switch or wiring issue, can interfere with the proper functioning of the taillights.
- How to Check What’s Wrong
To diagnose the issue, follow these steps:
- Inspect Other Lights – If your headlights, brake lights, and turn signals work fine, the issue is likely isolated to the taillight system.
- Check the Bulb – Remove the taillight bulb and examine it for a broken filament or dark discoloration. If the bulb is faulty, replacing it should restore functionality.
- Test the Fuse – Locate the fuse box (usually under the dashboard or hood) and check the taillight fuse. A broken or burned fuse should be replaced with one of the same amperage.
- Examine the Wiring – Look for exposed, frayed, or corroded wires near the taillight assembly. If necessary, clean and reconnect any loose wires.
- Use a Multimeter – If the issue persists, use a multimeter to test for voltage at the taillight socket. No voltage indicates a wiring or switch issue.
Once you identify the cause, you can move on to fixing it.
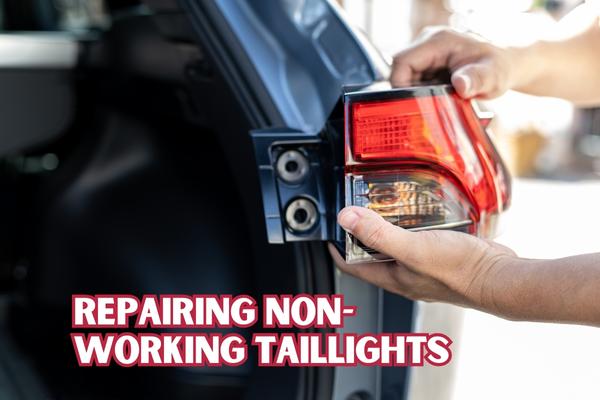
Repairing Non-Working Taillights
Now that you know what’s wrong, let’s go over the repair process based on the diagnosed issue.
- Replacing a Burnt-Out Taillight Bulb
If a bad bulb is the issue, follow these steps:
- Turn Off the Car – For safety, switch off the ignition before working on the taillights.
- Access the Taillight Assembly – Open the trunk or rear hatch and locate the taillight housing. Some cars have removable panels, while others require a screwdriver to access the bulb.
- Remove the Old Bulb – Twist the bulb socket counterclockwise and pull it out. Gently remove the old bulb by pulling it straight out or twisting it, depending on the design.
- Install a New Bulb – Insert a new taillight bulb of the same type and push it firmly into place.
- Test the Lights – Turn on the vehicle’s lights to ensure the new bulb is functioning before reassembling everything.
- Replacing a Blown Fuse
First, locate the fuse box, which is typically under the dashboard or in the engine compartment. Refer to your vehicle’s manual to find the specific fuse that controls the taillights. Once identified, carefully remove the damaged fuse with a fuse puller or a set of needle-nose pliers. Place a new fuse of the same amperage rating to maintain proper circuit protection and prevent electrical damage. After replacing the fuse, turn on your taillights to confirm they are working correctly. If the fuse blows again, there may be an underlying electrical issue requiring further inspection.
- Fixing Wiring or Grounding Problems
Inspect the wiring around the taillight assembly for signs of damage, such as exposed or broken wires. If the ground wire is corroded, clean the connection using a wire brush to restore proper conductivity. Ensure all loose wires are securely reconnected, using electrical tape if necessary. Finally, switch on the taillights to confirm that the issue has been resolved. If problems persist, further professional inspection may be required.
If these steps don’t fix the problem, further investigation by a professional may be necessary.
Case Study: Fixing a Taillight Issue in an SUV
Tom noticed his left taillight wasn’t working, even though the right one was fine. After checking the bulb, he found it was intact. He then located the fuse box under the dashboard and discovered that the taillight fuse was blown. Replacing the fuse took just a few minutes, and the light came back on. This quick fix saved him from a potential traffic citation and an unnecessary mechanic visit.
Conclusion
Repairing non-working taillights is often a simple process that can be done at home. Whether it’s replacing a bulb, swapping out a fuse, or fixing a wiring issue, addressing the problem quickly ensures your vehicle remains safe and road-legal. If troubleshooting steps don’t resolve the issue, seeking professional help is the next best step.
Want more DIY car repair guides? Check out our other articles, like ‘Diagnosing Blown Car Electrical Circuits,’ for expert tips on vehicle maintenance!
FAQs About Repairing Non-Working Taillights
1. Why do my brake lights work but not my taillights?
A blown fuse, faulty light switch, or wiring issue could be the reason. Check the fuse first before inspecting other components.
2. How much does it cost to fix a taillight?
Replacing a bulb typically costs $10–$20, while wiring repairs may range from $100–$200 if done professionally.
3. Can I drive with a broken taillight?
No, driving with a non-working taillight is illegal in most areas and can result in a ticket.
4. What if both taillights stop working at the same time?
A blown fuse or faulty switch is the most likely cause. Replacing the fuse or checking the switch should fix the issue.
5. How often should I check my taillights?
It’s a good practice to inspect your taillights every few months or whenever you perform routine vehicle maintenance.